Your Minecraft server can be live in under two minutes. No terminal commands, no config files to edit by hand — just pick your settings, hit checkout, and you are in. Here is exactly how it works.
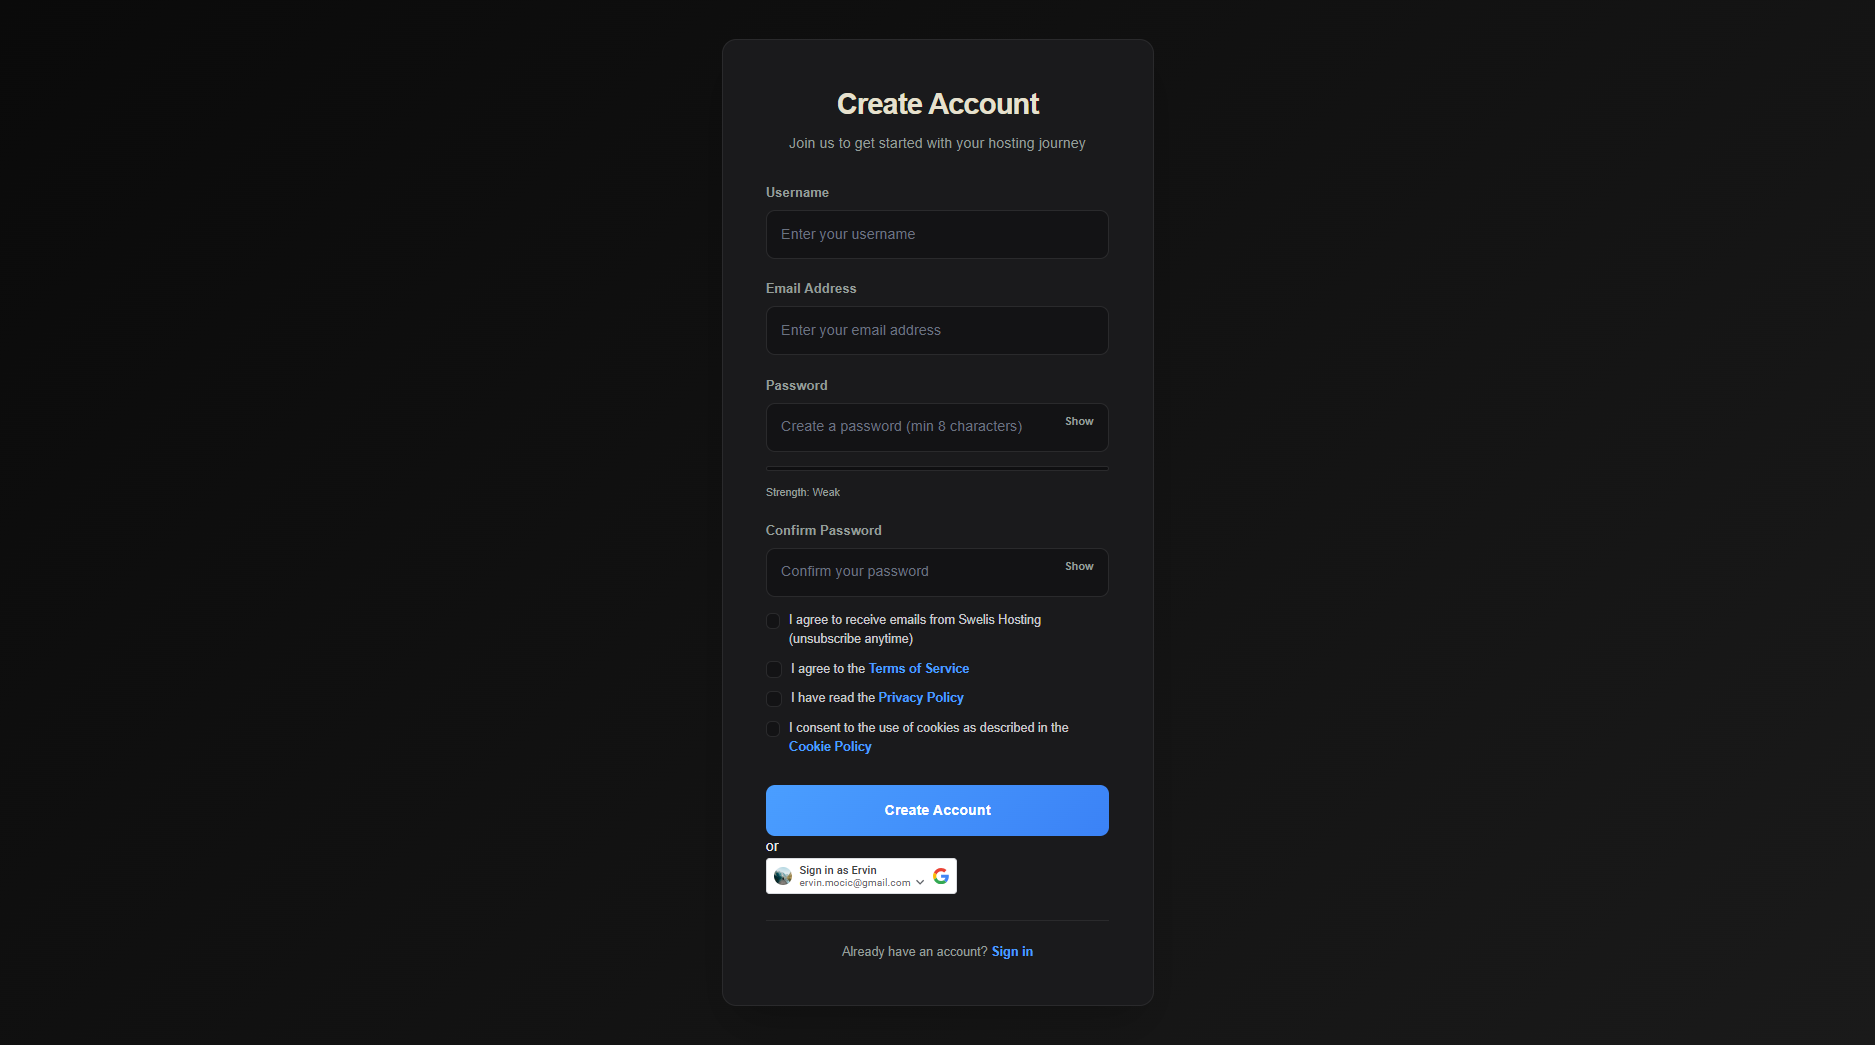
1. Create Your Account
Head to hosting.swelis.com and click Sign Up in the top right. You can register with your email or sign in instantly with Google.
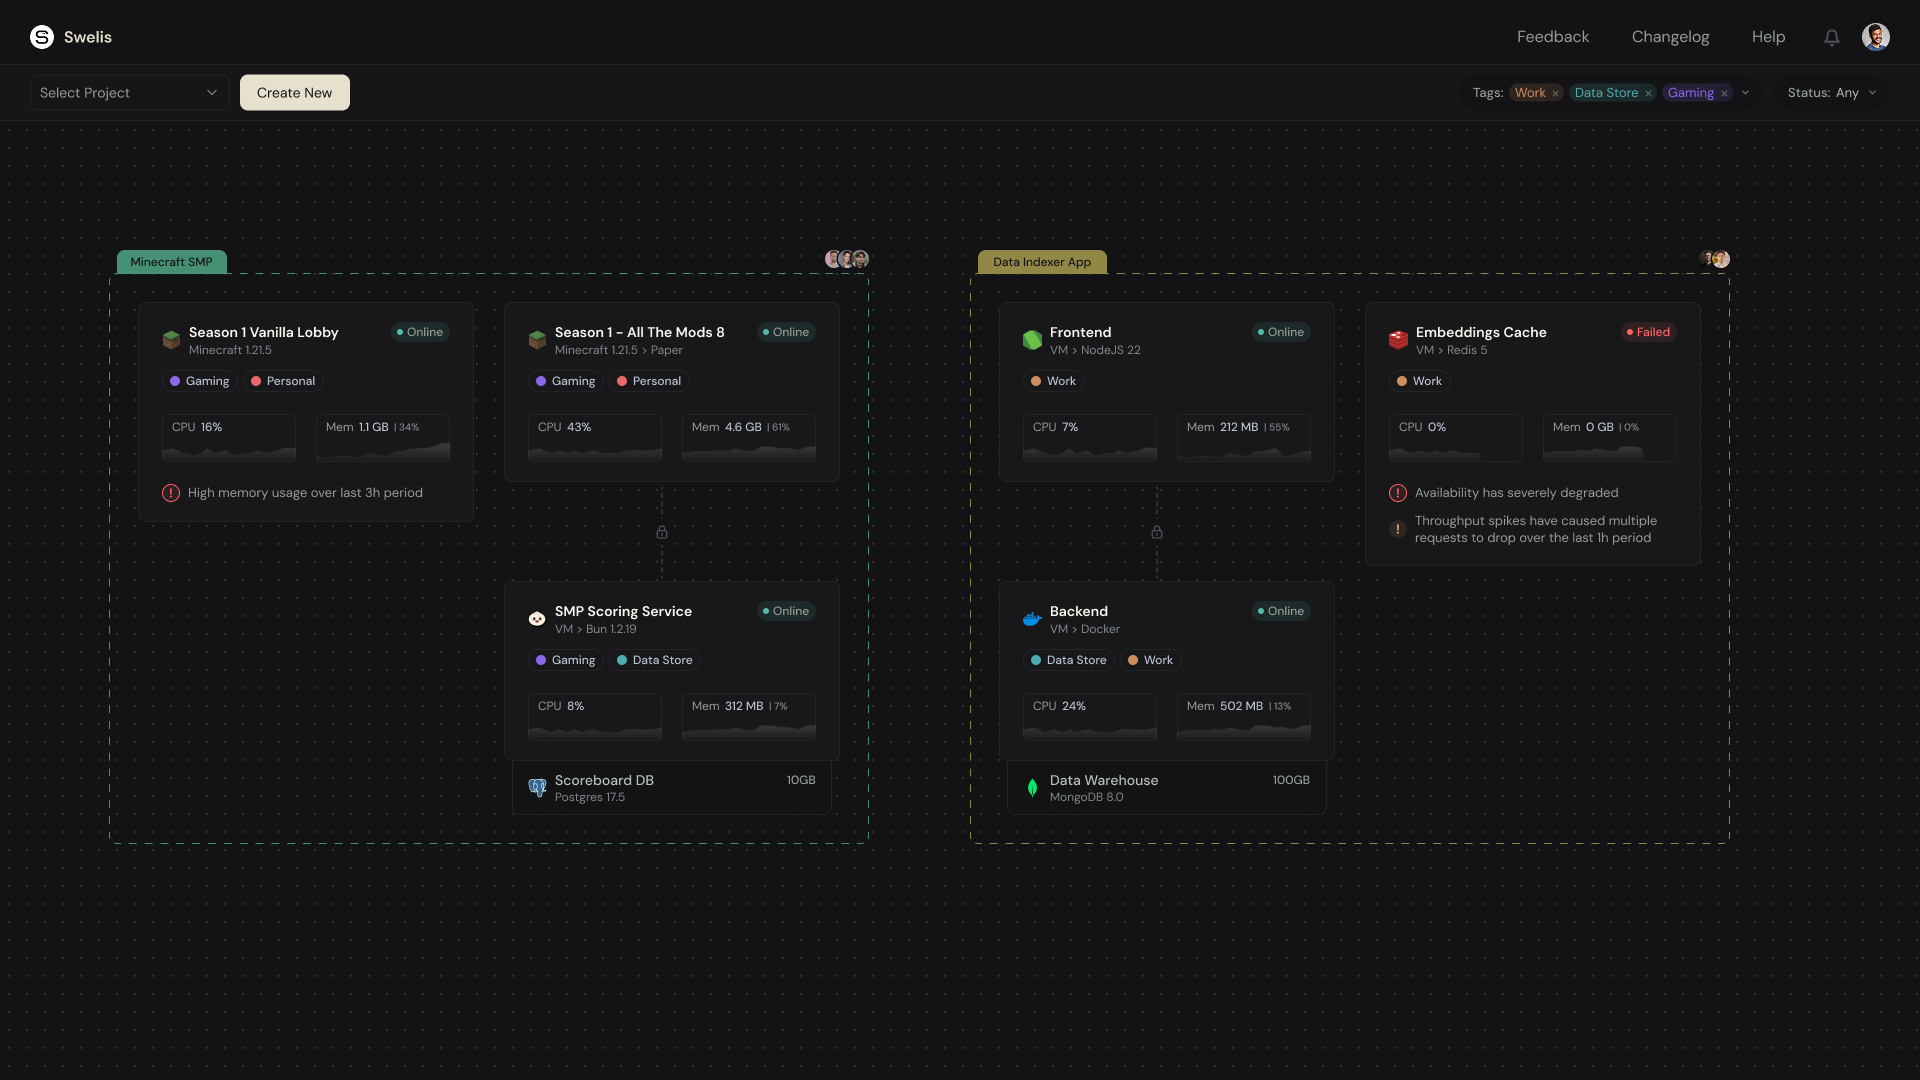
Once you have confirmed your email you will land on the dashboard — your home base for everything.
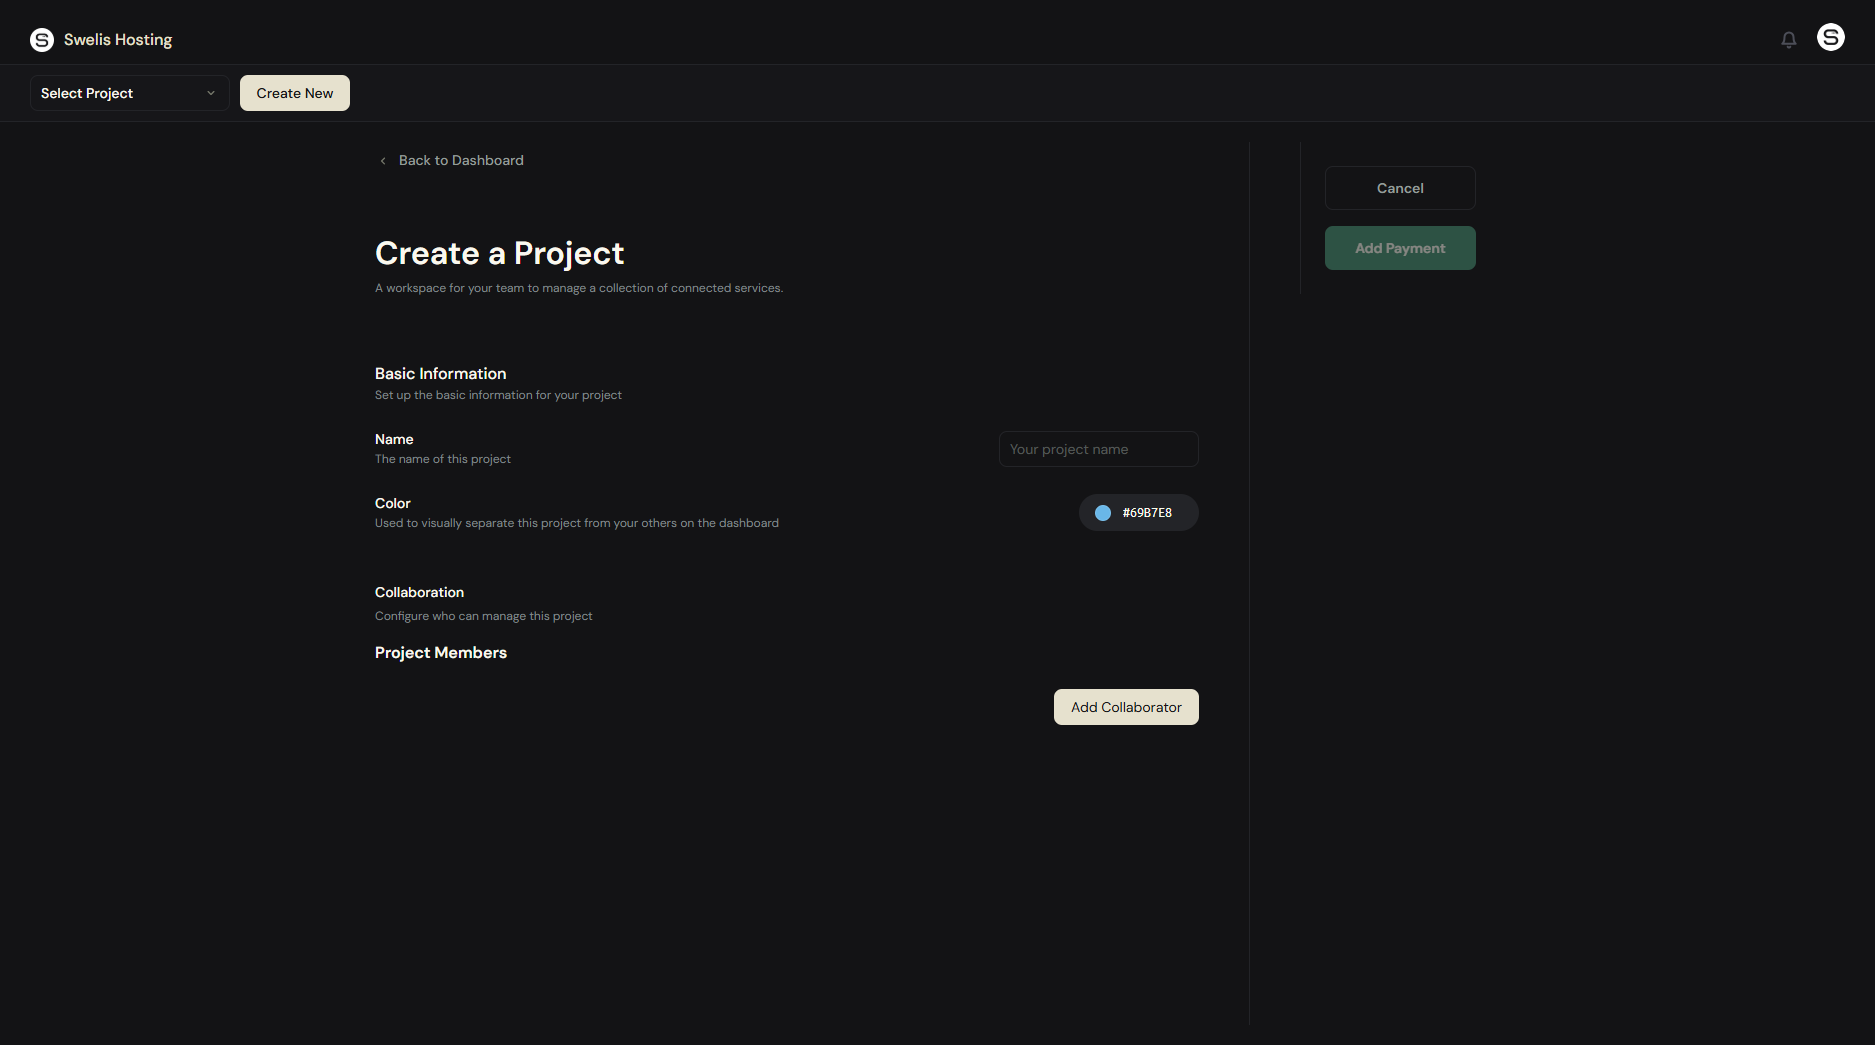
2. Create a Project
Projects are how Swelis organizes your services. Think of a project like a folder — it groups your Minecraft servers, websites, and databases together.
Click Create New in the toolbar. Give your project a name (your server community name works great) and hit create.
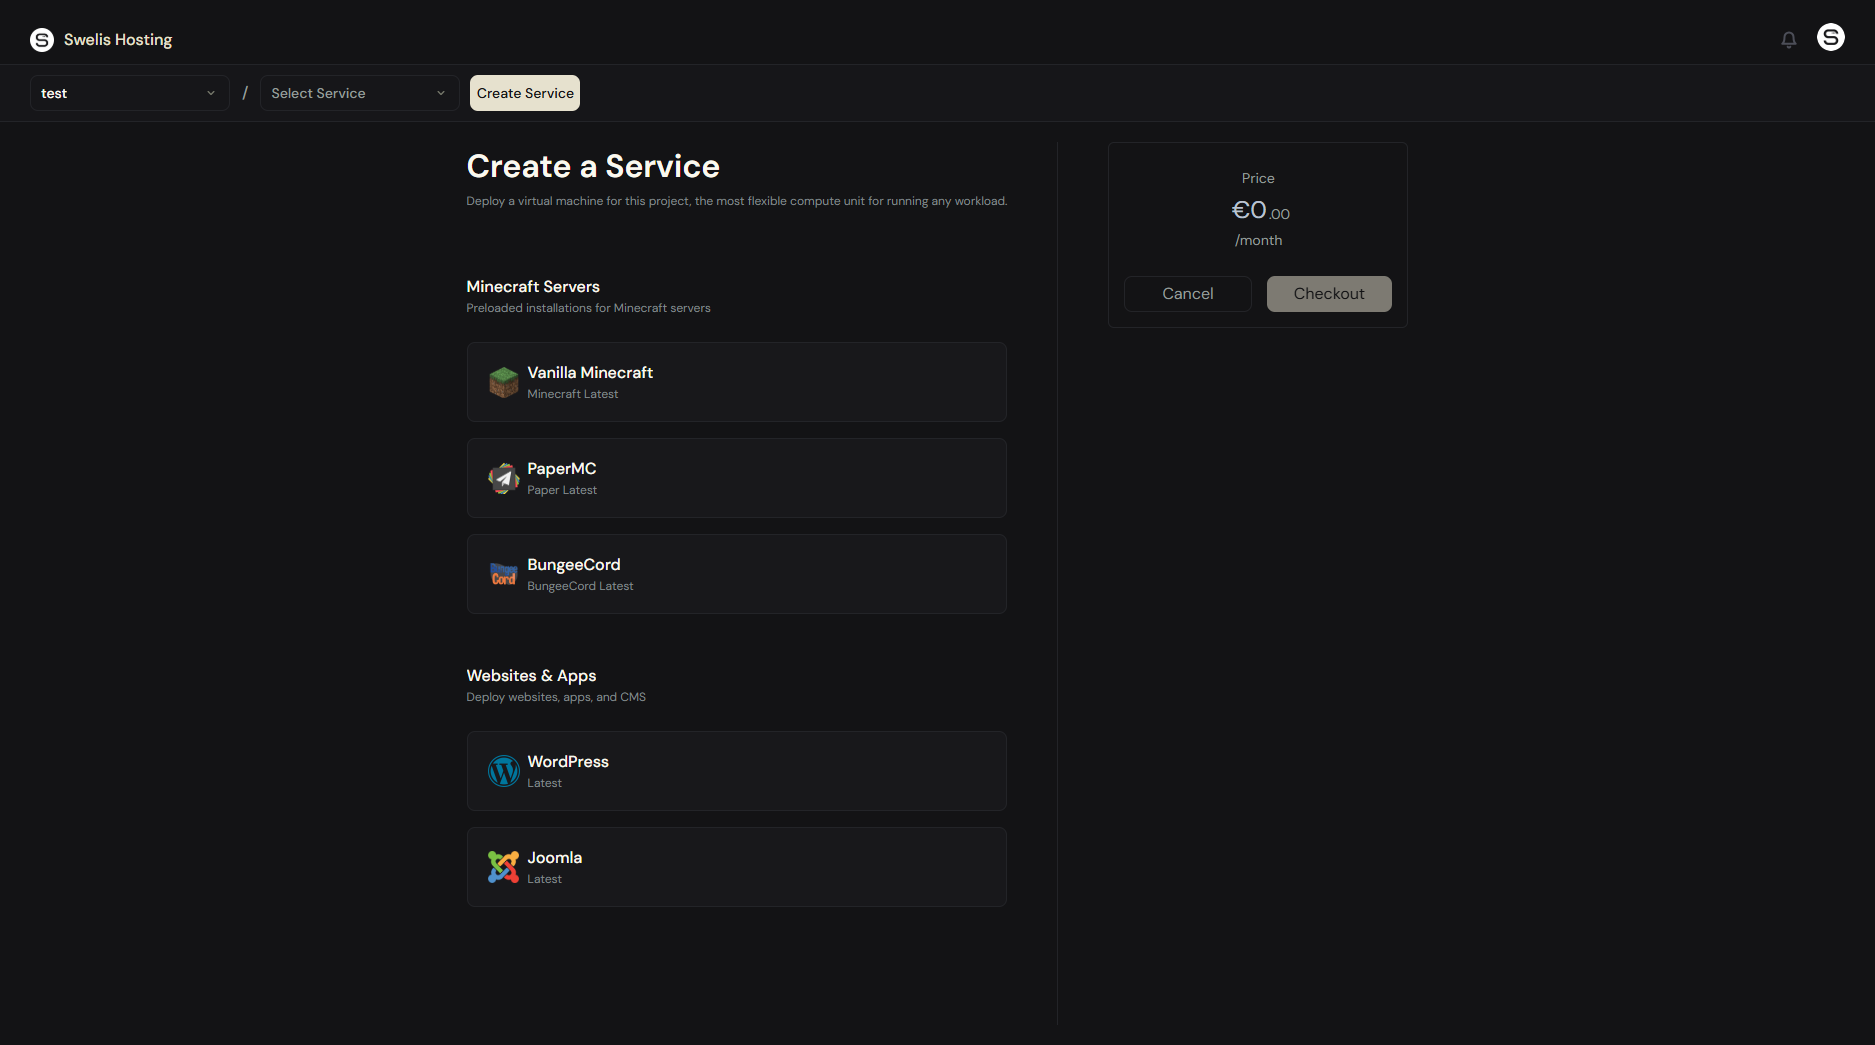
3. Pick Your Server Type
With your project selected, click Create New again. You will see a grid of templates:
- Vanilla — the classic, unmodified experience
- PaperMC — optimized for performance and plugins (recommended)
- BungeeCord — proxy for linking multiple servers
Also available in our hosting panel within the Minecraft Server Tab:
- Forge — the original mod loader
- Fabric — a new, optimized, twist to mods
Pick the one that fits your playstyle. If you are not sure, PaperMC is the best starting point — it is fast, supports thousands of plugins, and just works.
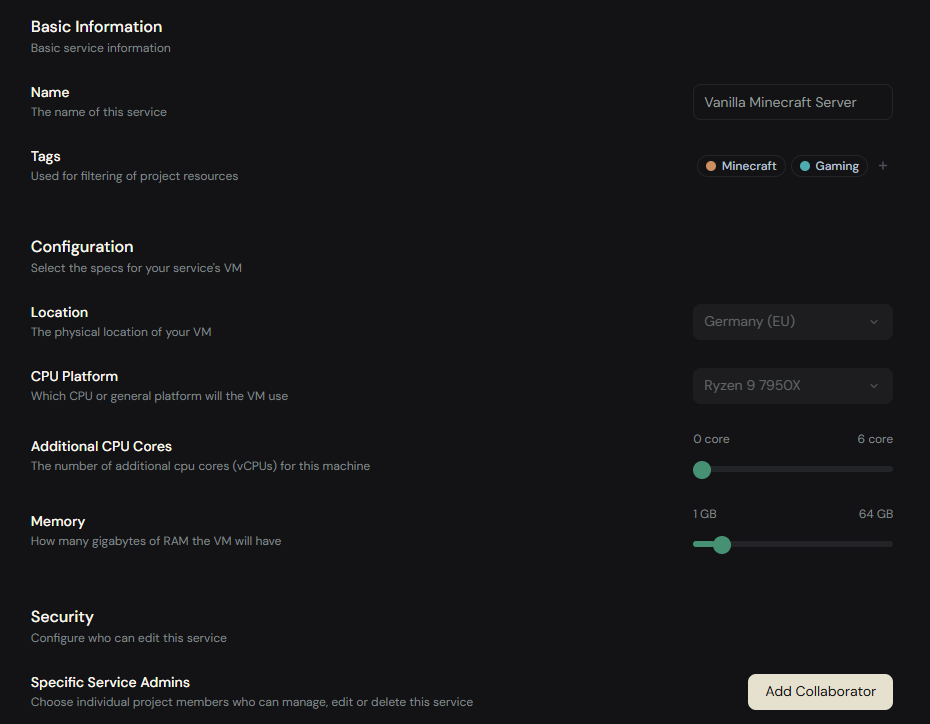
4. Configure Your Server
Now for the fun part. You will see a configuration panel with these options:
Name — give your server a name (up to 16 characters). This shows in your dashboard.
RAM — slide to choose how much memory your server gets. This is the single biggest factor in performance:
| Players | Recommended RAM | Monthly Cost |
|---|---|---|
| 1–5 | 2 GB | €3 |
| 5–15 | 4 GB | €6 |
| 15–30 | 8 GB | €12 |
| 30–50 | 12 GB | €18 |
| 50+ | 16 GB+ | €24+ |
Tip: Running modpacks? Add an extra 2–4 GB on top of these recommendations. Mods are hungry.
CPU — additional cores for heavy workloads. Most servers run great with the default, but large modpacks or 40+ players benefit from extra cores.
Tags — color-coded labels to keep your dashboard organized.
The price updates in real time on the right side as you adjust settings. Every plan includes NVMe storage, DDoS protection, automatic backups, and FTP access — no hidden extras.
5. Checkout
Review your configuration summary, enter your billing details if it is your first purchase, and confirm. Swelis uses Stripe for secure payments — your card is charged monthly.
Got a discount code? Enter it on the checkout screen before confirming to apply it to your first month.
That is it. Your server starts provisioning immediately. Within about 60 seconds you will see it appear in your dashboard as Online.
6. Your Server Is Live
Click your new server to open the management panel. Here is what you will find:
Console
A live, real-time view of your server output. You can type commands directly — try list to see who is online. The console streams instantly, no refreshing needed.
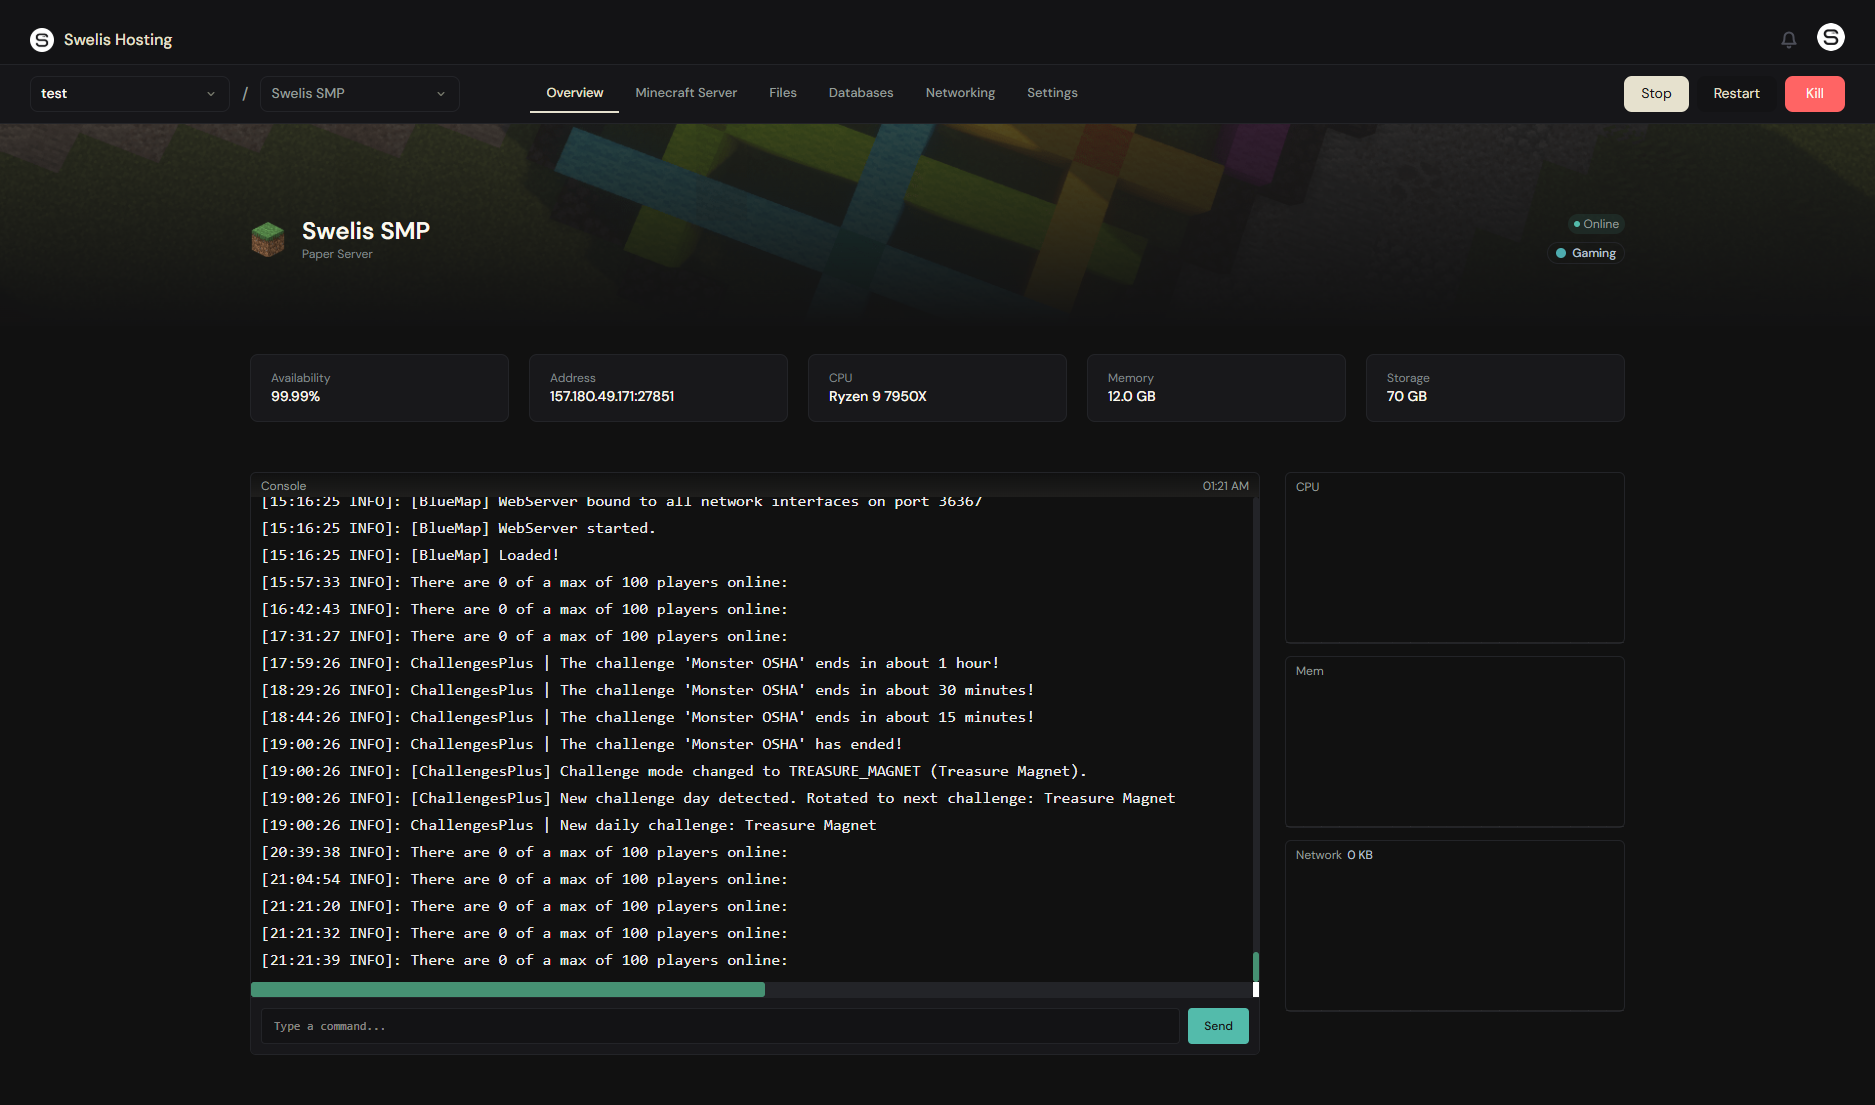
Resource Monitors
CPU, RAM, and network usage displayed as live graphs. You will always know exactly how your server is performing.
File Manager
Browse, upload, download, and edit your server files directly in the browser. Need to tweak server.properties or drop in a world save? Do it right here — no FTP client needed (though FTP access is included too).
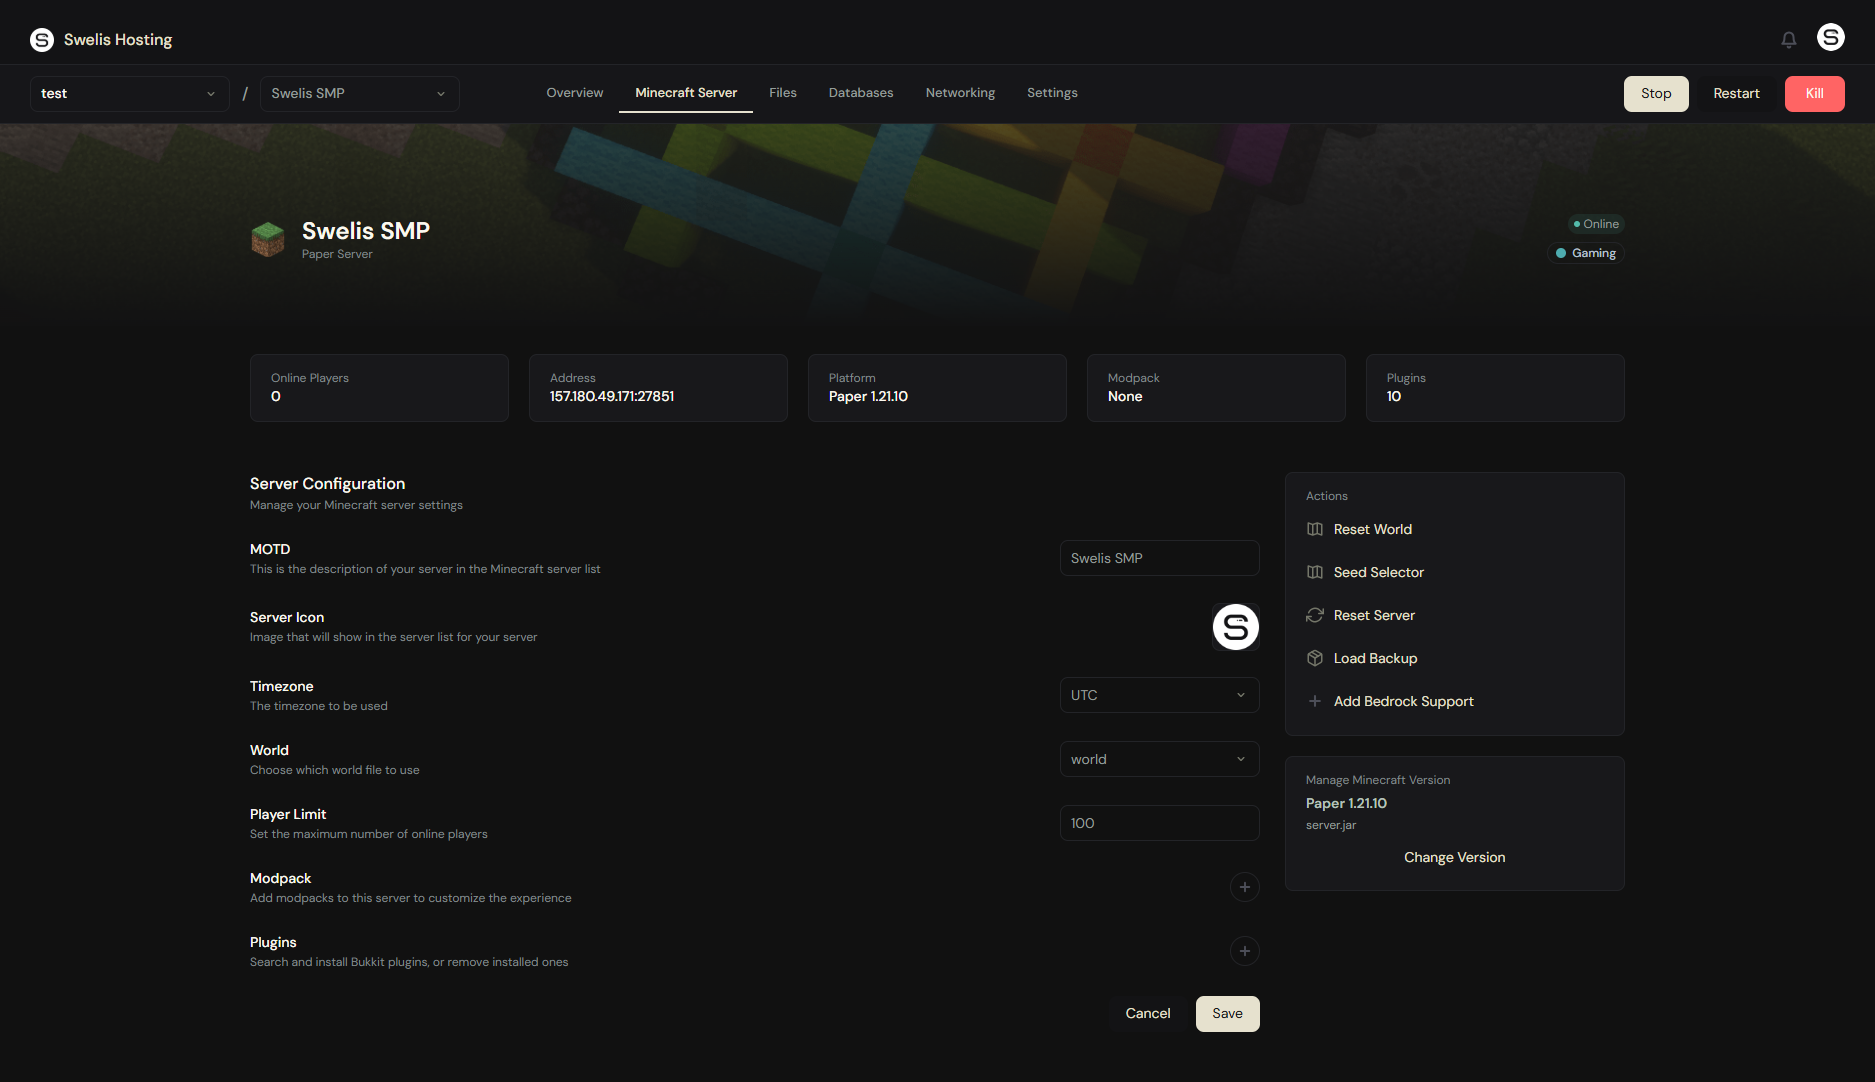
Minecraft Tab
This is where the magic happens:
- Plugins — search and install from thousands of Spigot/Bukkit plugins with one click
- Modpacks — browse and install modpacks from Modrinth
- Backups — create, restore, and export world backups
- Server Jar — swap between Paper, Vanilla, Forge, and more without starting over
- World Settings — reset worlds, pick seeds, change game modes
- Server Icon — upload a custom icon that players see in their server list
- Bedrock Support — enable cross-play with Bedrock Edition players via Geyser
Settings
Upgrade your RAM or CPU at any time — changes apply on the next restart. Add team members as Admins or Viewers to help manage your server.
Connect and Play
Grab your server address from the dashboard and add it to your Minecraft client:
- Open Minecraft → Multiplayer → Add Server
- Paste your server address
- Hit Join Server
You are in.
What Is Next?
Now that your server is running, here are a few things to try:
- Start an SMP — ready to build a community? Read our complete SMP server guide for plugins, permissions, and rules setup
- Install plugins — check out our Best Minecraft Server Plugins 2026 for our top 20 picks, each with a one-click install link
- Invite friends — share your server address and start building
- Fix lag issues — if things feel slow, check out How to Fix Minecraft Server Lag
- Set up backups — create your first backup so you never lose progress
- Customize your MOTD — the message players see in their server list
Every Swelis plan comes with DDoS protection, NVMe storage, and 24/7 support. If you ever get stuck, reach out — we are here to help.
Welcome to Swelis. Happy crafting.
Related Guides
- Minecraft Server Console Commands Cheat Sheet — every command you need, organized by category
- Minecraft Server Hosting 101 — the complete beginner guide to hosting your own server