
Survive, Build, Dominate — On Your Own Server
Rust is brutal. Waking up naked on a beach, scavenging for resources, building a base, and defending it against everyone else — it's one of the most intense survival games out there. Running your own server means you control the rules: wipe schedules, map size, group limits, and who gets to play.
With Swelis, setting one up takes less than two minutes.
1. Create Your Server
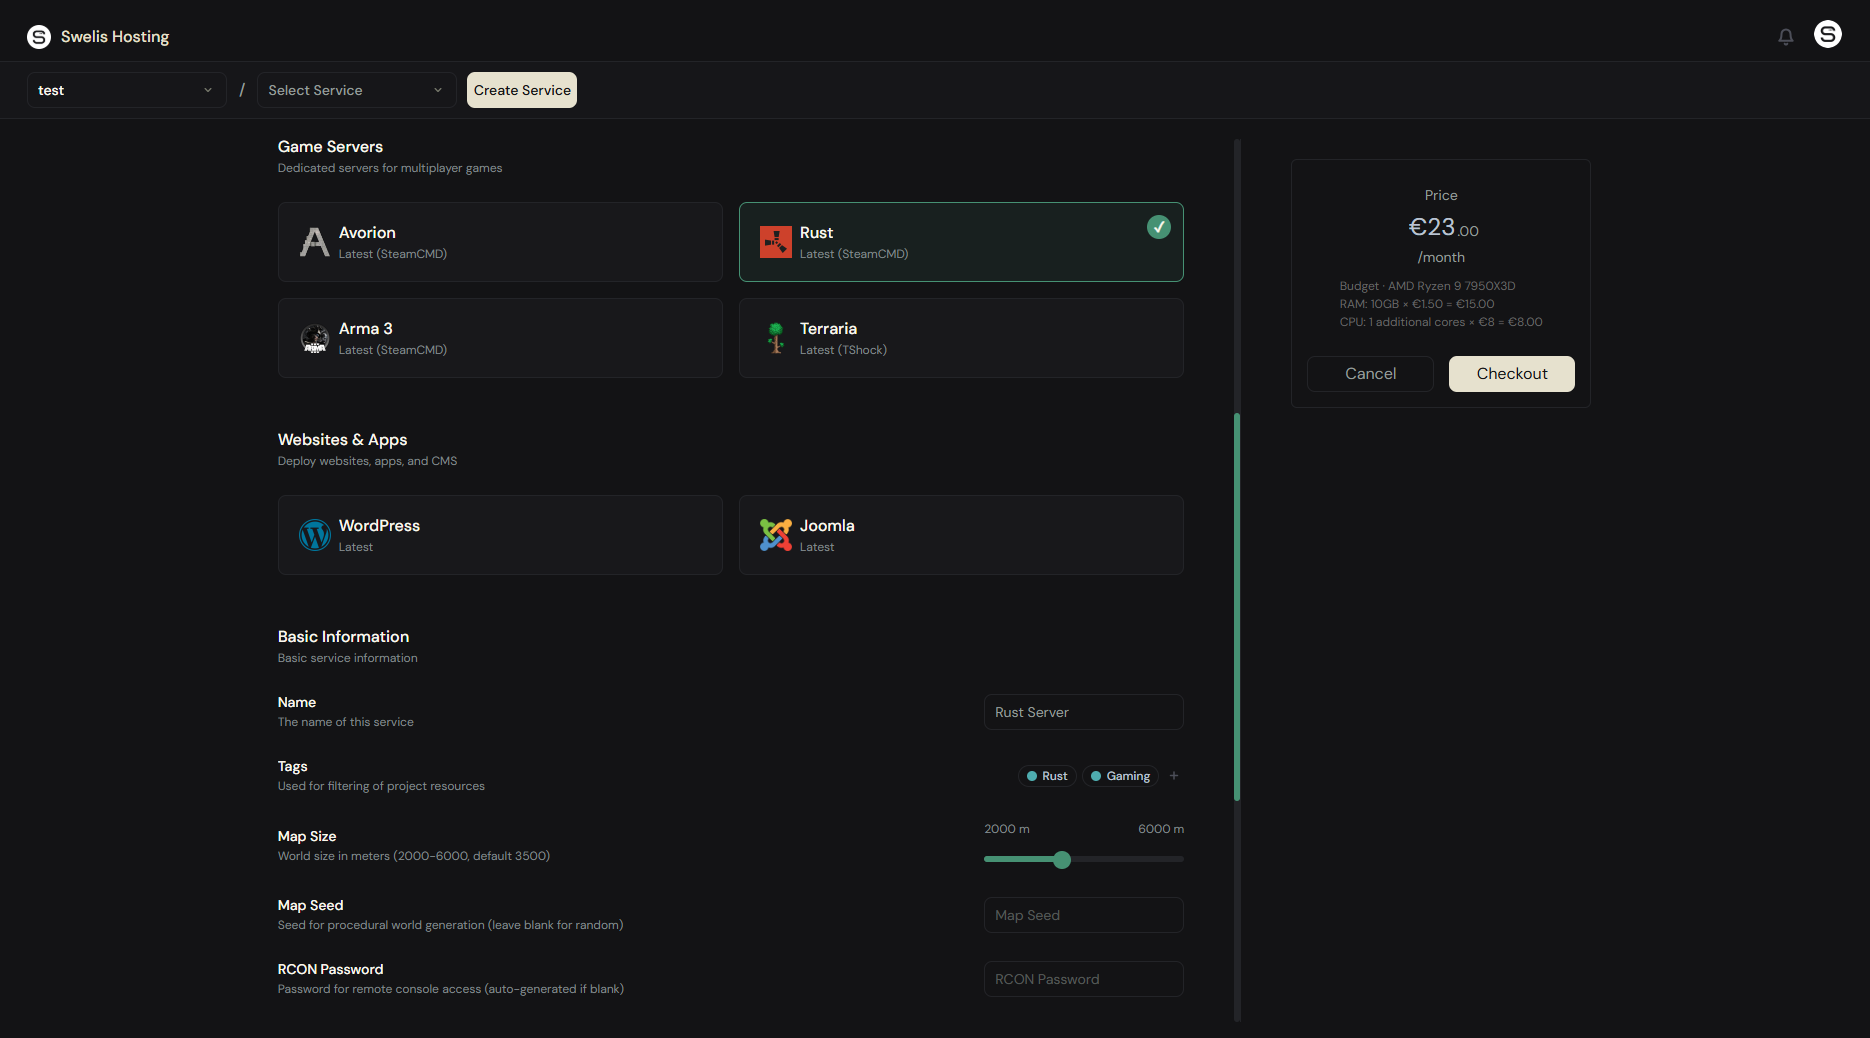
Log in to the Swelis Dashboard and click Create Service. Under Game Servers, select the Rust template.
Configure the basics:
- Server Name — What players see in the server browser
- Map Size — 2000m to 6000m (default 3500m). Bigger maps need more RAM
- Map Seed — Leave blank for random, or enter a specific seed for a known layout
- RCON Password — For remote console access (auto-generated if left blank)
- Memory — 8 GB minimum, 10 GB recommended. Rust is hungry
- CPU Cores — 1 additional core recommended for smooth gameplay
Click Create and Swelis handles the rest — SteamCMD downloads the latest Rust server build, your map generates, and the server starts automatically.
2. Connect and Play
Open Rust, press F1 to open the console, and type:
client.connect YOUR_IP:YOUR_PORT
Your server IP and port are shown in the dashboard. Or search for your server name in the in-game server browser.
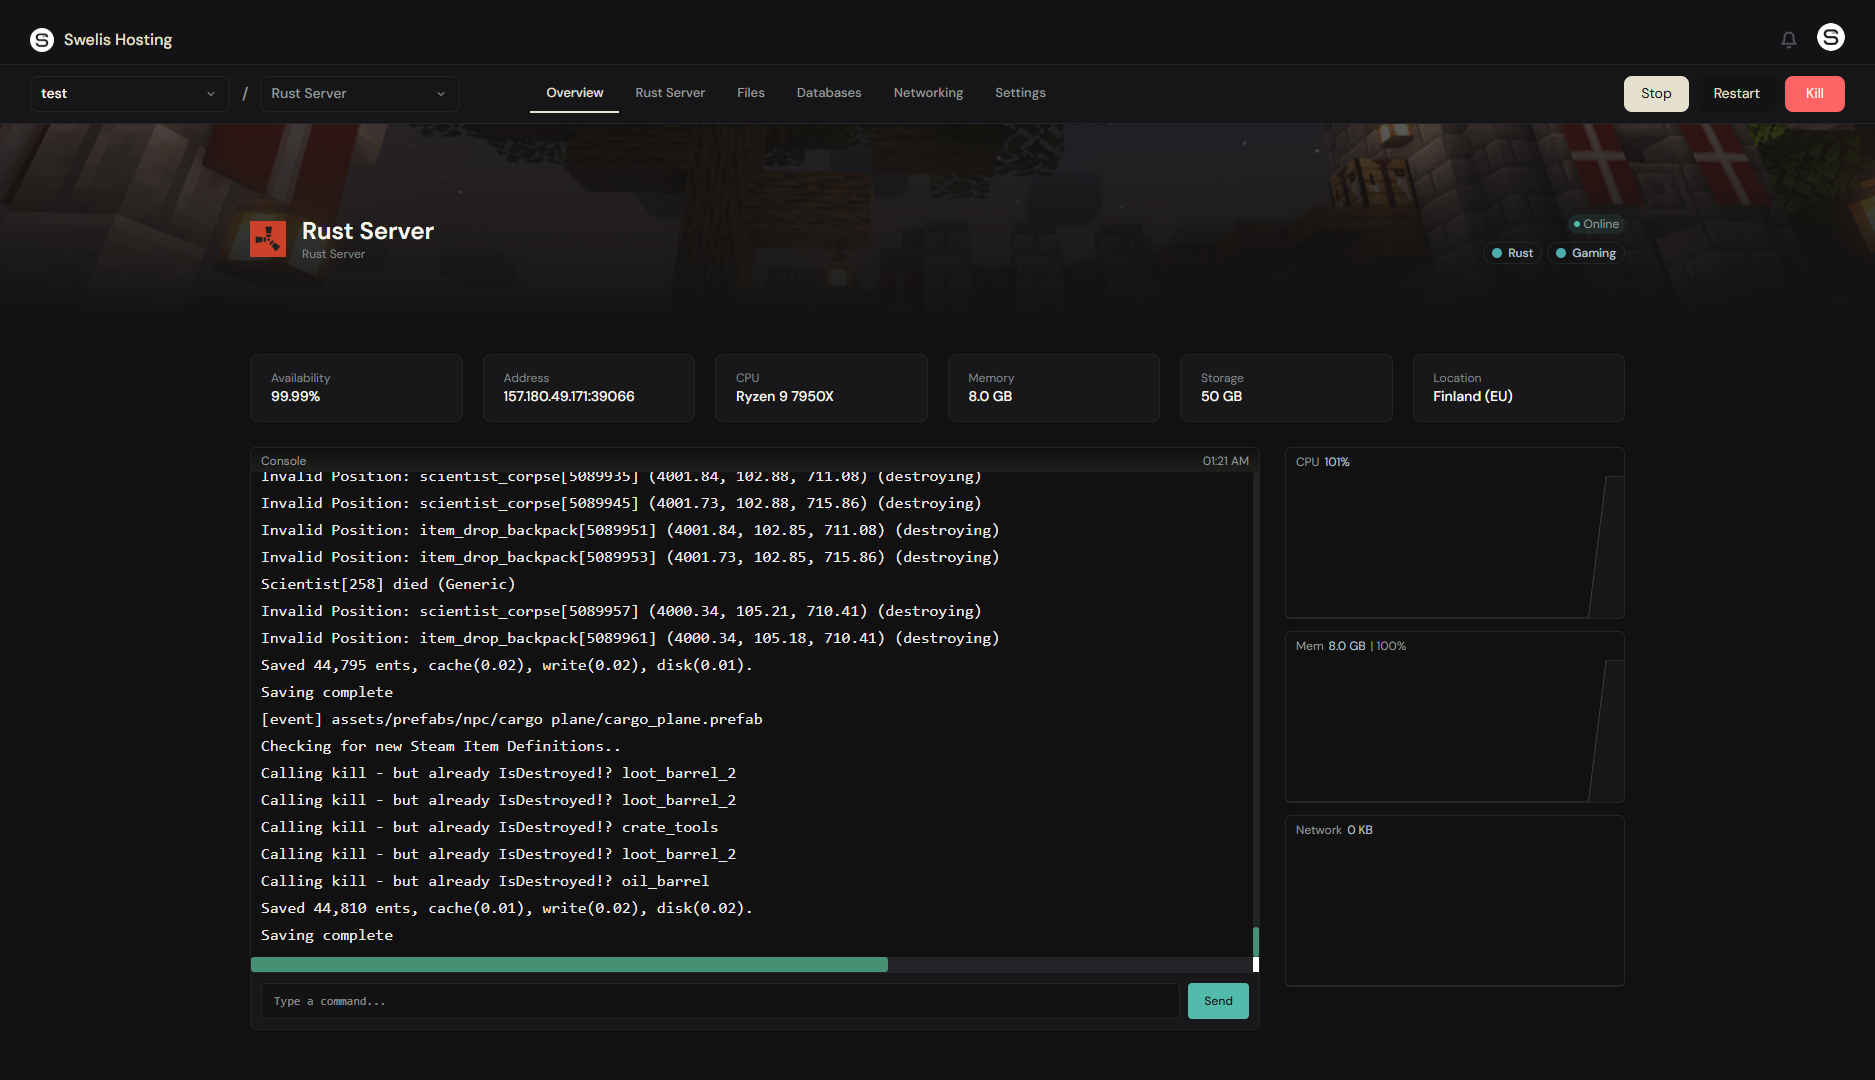
3. Manage Your Server
Everything runs through the Swelis Control Panel:
- Console — Run RCON commands in real-time (
server.writecfg,oxide.reload, etc.) - File Manager — Edit
server.cfg, upload plugins, manage oxide configs - FTP Access — Bulk transfer files with FileZilla or any FTP client
- Backups — Snapshot before wipes and restore in one click
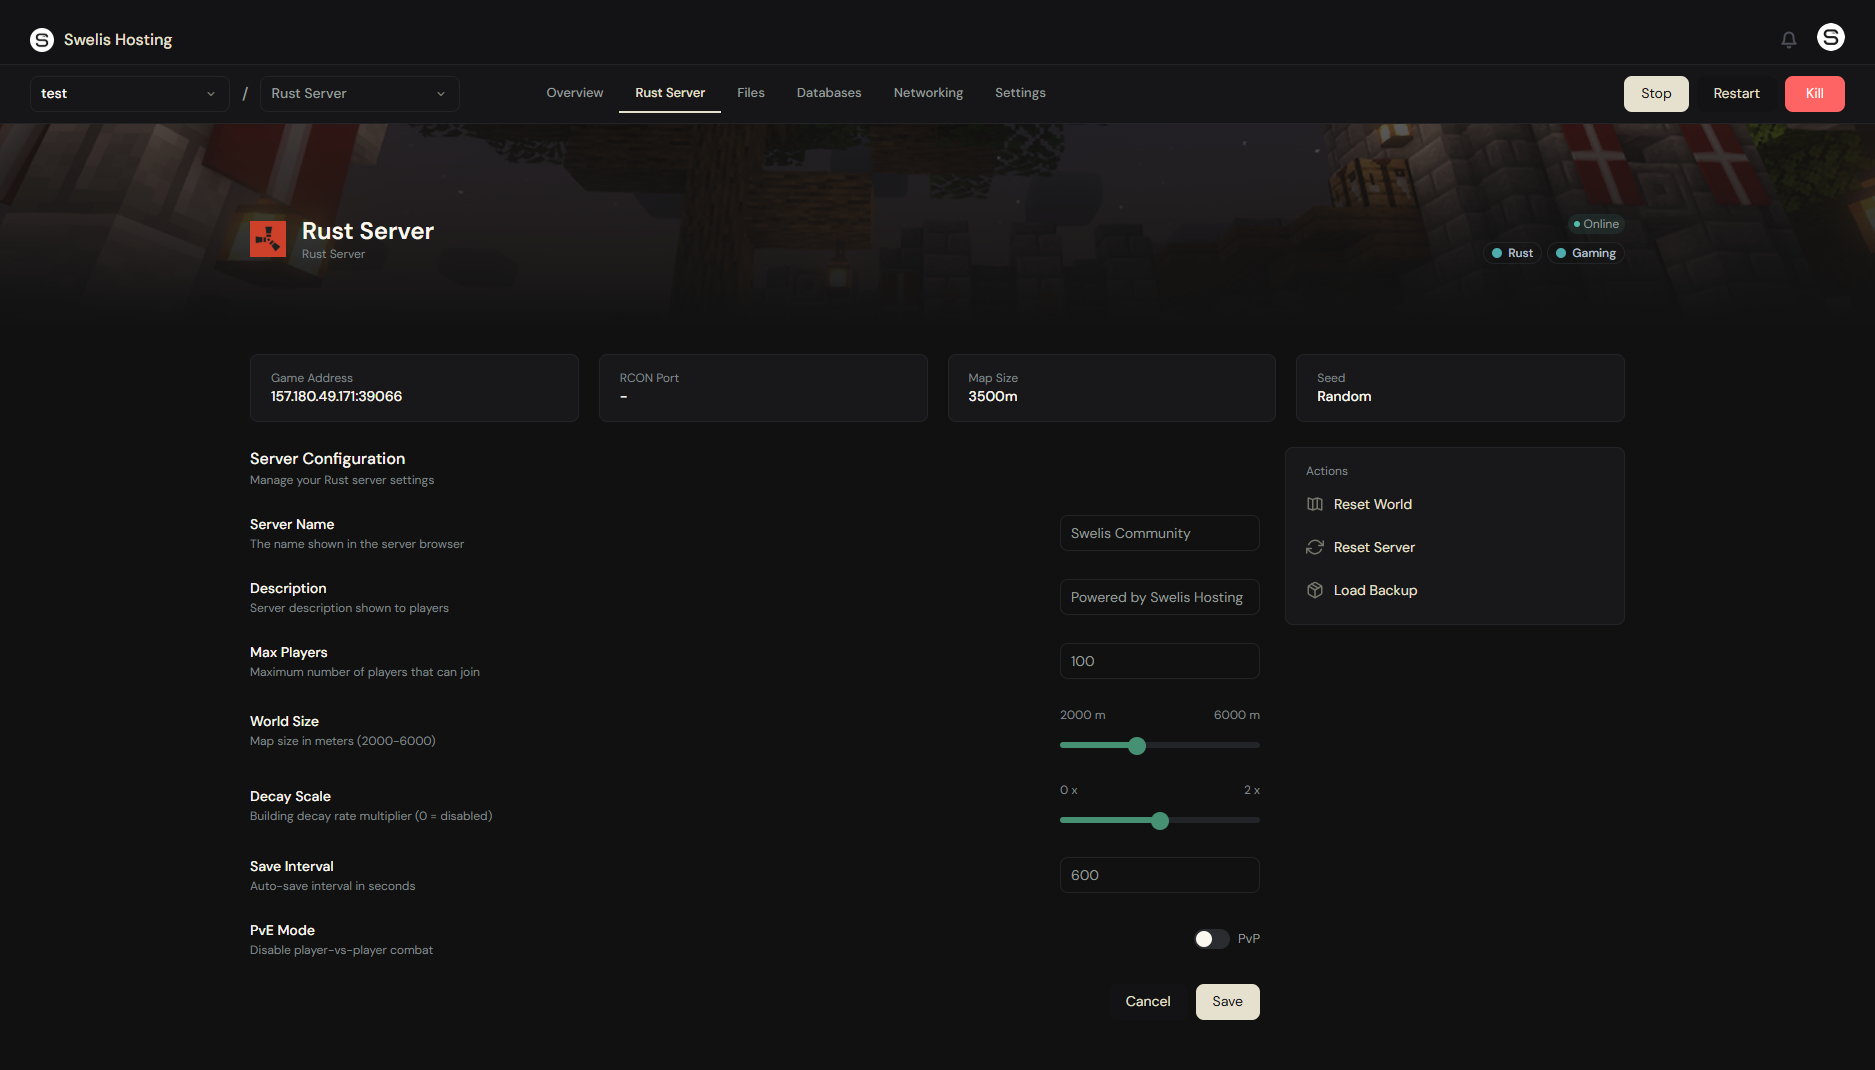
4. Customize Your Server
Edit your server.cfg from the file manager to tweak gameplay:
| Setting | Default | What it does |
|---|---|---|
server.maxplayers | 50 | Max concurrent players |
server.worldsize | 3500 | Map size in meters |
server.seed | random | Procedural generation seed |
server.tickrate | 30 | Server tick rate |
decay.scale | 1 | Building decay speed (0 = off) |
server.pve | false | PvE mode (no player damage) |
5. Add Oxide/uMod Plugins
Rust modding runs through Oxide (uMod). Upload plugin .cs files to your oxide/plugins/ folder via the file manager or FTP, and they load automatically on the next server restart.
Popular plugins to start with:
- GatherManager — Adjust resource gather rates
- NTeleportation — /home, /tpa commands
- Clans — Team system with clan tags
- BetterChat — Custom chat formatting and colors
Tips for a Great Rust Server
Plan your wipe schedule. Most community servers wipe weekly or biweekly. Force wipes happen on the first Thursday of each month when Facepunch releases updates. Back up before every wipe.
Start with 10 GB RAM. Rust uses 6-8 GB baseline, and memory usage grows with map size and player count. Monitor usage from the dashboard and upgrade if you're consistently above 80%.
Set group limits early. Rust is dominated by large groups on vanilla settings. Plugins like Team Limits keep things competitive for solos and small groups.
Use RCON wisely. The console gives you full server control — ban players, adjust settings, trigger saves. Your RCON password is shown in the dashboard.
Related Guides
- Set Up a Minecraft Server — The same dashboard powers Minecraft, Avorion, Terraria, and Arma 3 servers
- Backup Strategies — Never lose your world to a bad wipe
- A Tour of the Swelis Control Panel — Console, files, FTP, and more
- Optimize Server Performance — Keep TPS high and lag low
Ready to rust? Create your server now and be raiding in under two minutes.